I know it's been a while, but remember how I was redoing my closet and wardrobe using ideas from Haley's The No Brainer Wardrobe? I have to tell you something. I love that I can see what I have in my closet and not have to dig in the back. Everything I currently own is stuff I will use again and again. Nothing in there (that I can think of right now) is something that will just sit there. It's so nice and easy.
I know where everything is (even the stuff in my dresser drawers). I can't tell you how freeing this process has been. I find it easy to get ready and look put together when I need to. I can't thank Hayley enough for all she's done. Coming soon.... some favorite outfits! I love that part!
Fore more on how to feel better about your ensemble without the stress of not knowing what to wear, click The No Brainer Wardrobe on your right side. Great ebook and so easy. I love that Hayley gives you action steps to take that are simple and that the advice has worked!
Showing posts with label Getting Organized. Show all posts
Showing posts with label Getting Organized. Show all posts
Thursday, June 14, 2012
Wednesday, April 25, 2012
Clothing Adventure Part 3: The Purge
Ah... Yes, I've been working out my wardrobe situation. I hate not knowing what to wear in the morning and staring blankly in my closet for 10 minutes a day. It drives me nuts. As you know, I've been reading and working my way through the No-Brainer Wardrobe (ebook by Hayley Morgan- click link on right to buy for $7.99).
I mentioned in the last post that I was getting ready to purge my closet. I did it. I spent a Saturday afternoon alone and decided I would work my way through the closet. It was so good to do and I feel great about it. Yes, I found it difficult, but it was definitely worth it.
I went through EVERY item in the closet. I tried most on to make sure they fit. If I had worn it recently, I didn't bother trying it on. I even went through things in the drawers (t-shirts, shorts, work out gear, camis, shoes). I left no stone unturned.
Having said that, imagine my surprise when I pull out a dress bag. Uncertain of what was in it, I opened it and pulled out a dress that has NEVER been worn and still had the tag on it. I remember I bought this dress about 7 years ago at Express when I needed a little black dress. Check it out....
After I went through everything, here's what my closet looked like. I'll even put a before and after together- not that you'll notice much until you see the stacks of purged clothing.
I didn't really get rid of any jeans on the top shelf. I have a dressy pair, gray pair, regular light blue pair, and another darker wash jean. I also own 2 other pair- bright blue skinny and cute dark flare jeans. I had just lost 2 pair to tears/holes.
The dress pants didn't change either. There are 2 pair of khaki capris up there (1 green 1 tan), a gray dress pant and black legging. I got rid of quite a bit of skirts and a favorite dress. I actually almost shed tears over my dress. We've been together for 12 years and to say goodbye was hard. I'm certain more will be purged as I just realized I have 3 pair of black pants, not including the cropped black pants I wear year round. I've just gotta figure out which to keep and which to purge. All are different styles so all may stay.
The purge pile is overflowing. I have friends who want me to save it all for a June clothing swap, but I'm noticing the danger in this. I keep grabbing things out of the pile.... That's not purging.
Next up, I'll be piecing together outfits and adding a few things that I really want for in my wardrobe and a few things that will replace others (the basics- tees, tanks, etc.).
If you're interested in purchasing a copy of the book to learn more about what's happening here and help yourself through the process, click the button on the right. You can also visit The Tiny Twig's 31 days series about The No Brainer Wardrobe here.
I mentioned in the last post that I was getting ready to purge my closet. I did it. I spent a Saturday afternoon alone and decided I would work my way through the closet. It was so good to do and I feel great about it. Yes, I found it difficult, but it was definitely worth it.
I went through EVERY item in the closet. I tried most on to make sure they fit. If I had worn it recently, I didn't bother trying it on. I even went through things in the drawers (t-shirts, shorts, work out gear, camis, shoes). I left no stone unturned.
Having said that, imagine my surprise when I pull out a dress bag. Uncertain of what was in it, I opened it and pulled out a dress that has NEVER been worn and still had the tag on it. I remember I bought this dress about 7 years ago at Express when I needed a little black dress. Check it out....
 |
| Front detail |
 |
| Bias cut hem... LOVE IT! |
 |
| The tag in tact- BTW, I highly doubt I paid that price. You know me, I'm frugal |
 |
| Before the purge |
 |
| After the purge and I was able to hang clothes from the drawers! |
I didn't really get rid of any jeans on the top shelf. I have a dressy pair, gray pair, regular light blue pair, and another darker wash jean. I also own 2 other pair- bright blue skinny and cute dark flare jeans. I had just lost 2 pair to tears/holes.
The dress pants didn't change either. There are 2 pair of khaki capris up there (1 green 1 tan), a gray dress pant and black legging. I got rid of quite a bit of skirts and a favorite dress. I actually almost shed tears over my dress. We've been together for 12 years and to say goodbye was hard. I'm certain more will be purged as I just realized I have 3 pair of black pants, not including the cropped black pants I wear year round. I've just gotta figure out which to keep and which to purge. All are different styles so all may stay.
The purge pile is overflowing. I have friends who want me to save it all for a June clothing swap, but I'm noticing the danger in this. I keep grabbing things out of the pile.... That's not purging.
 |
| I will not grab anything from this pile of 3 garbage bags... will not, will not.... |
Next up, I'll be piecing together outfits and adding a few things that I really want for in my wardrobe and a few things that will replace others (the basics- tees, tanks, etc.).
If you're interested in purchasing a copy of the book to learn more about what's happening here and help yourself through the process, click the button on the right. You can also visit The Tiny Twig's 31 days series about The No Brainer Wardrobe here.
Sunday, April 22, 2012
A Clothing adventure Part 2
I know it's been a week since Part 1, but bear with me while I work through The No Brainer Wardrobe. I'm following the guidelines and action items to a T so I can help you see the process. I needed to spend a week pinning clothing and searching styles I like, so I did.
After pinning I too a look at my Pinterest style board to see what I had pinned. I noticed clean lines on the majority of the pants with a slight flare/bootcut to them. I noticed layers and layers and scarves of all styles. Lots of t-shirts too. What surprised me was the amount of dresses and skirts as well as non-jean outfits. I've always been a jeans person... What's up with this???
So, I then perused my closet to see what I had that was my favorite. Now, I need you to bear with me. I live in a house that is close to 100 years old. The closets are the width of a door and just deep enough for hangers. Here's a pic of my closet in between seasons.
I was supposed to get my 10 favorite things, but I don't really know what they are! Guess I'll be peaking in the closet a little longer every morning until I figure that out!
OH! I have to say in reading the book, I noticed there is a mention that 50-60 articles of clothing is plenty. I thought that was a lot.... until I started counting how many were jam packed into the closet. It's also important to know that there are clothes in my 2 dressers and bins upstairs that are off season clothing (dwindled down to 1 bin instead of 2) as well as clothes in the laundry (you know how that cycle never ends!).
Now I'm moving to the organizing/categorizing/purging the closet phase. Mind you, I just assembled 2 bags of clothing to send off somewhere 2 weeks ago. Some of the clothes had tags on them. I've had them for a year or more and never wore them because I didn't like the style or material. Like I said, a lot of what I have is hand me down or gifted clothing. I don't mind it, it just doesn't always work out. I'm learning not to feel guilty about that! I'll be back Wednesday with a post on what I've gotten rid of and what I'm keeping.
Also, if you're interested in purchasing a copy of the book to learn more about what's happening here and help yourself through the process, click the button on the right. You can also visit The Tiny Twig's 31 days series about The No Brainer Wardrobe here. If you haven't read The Tiny Twig, you really should. Hayley is amazing and I don't even know her personally, but I would love to be her BFF. :) So inspirational.
After pinning I too a look at my Pinterest style board to see what I had pinned. I noticed clean lines on the majority of the pants with a slight flare/bootcut to them. I noticed layers and layers and scarves of all styles. Lots of t-shirts too. What surprised me was the amount of dresses and skirts as well as non-jean outfits. I've always been a jeans person... What's up with this???
So, I then perused my closet to see what I had that was my favorite. Now, I need you to bear with me. I live in a house that is close to 100 years old. The closets are the width of a door and just deep enough for hangers. Here's a pic of my closet in between seasons.
 |
| My scarves and belts. |
 |
| No room for everything, so whatever pants can be folded without a lot of wrinkling go on the top shelf. Tons of hangers everywhere and lots of clothes I don't wear in there. |
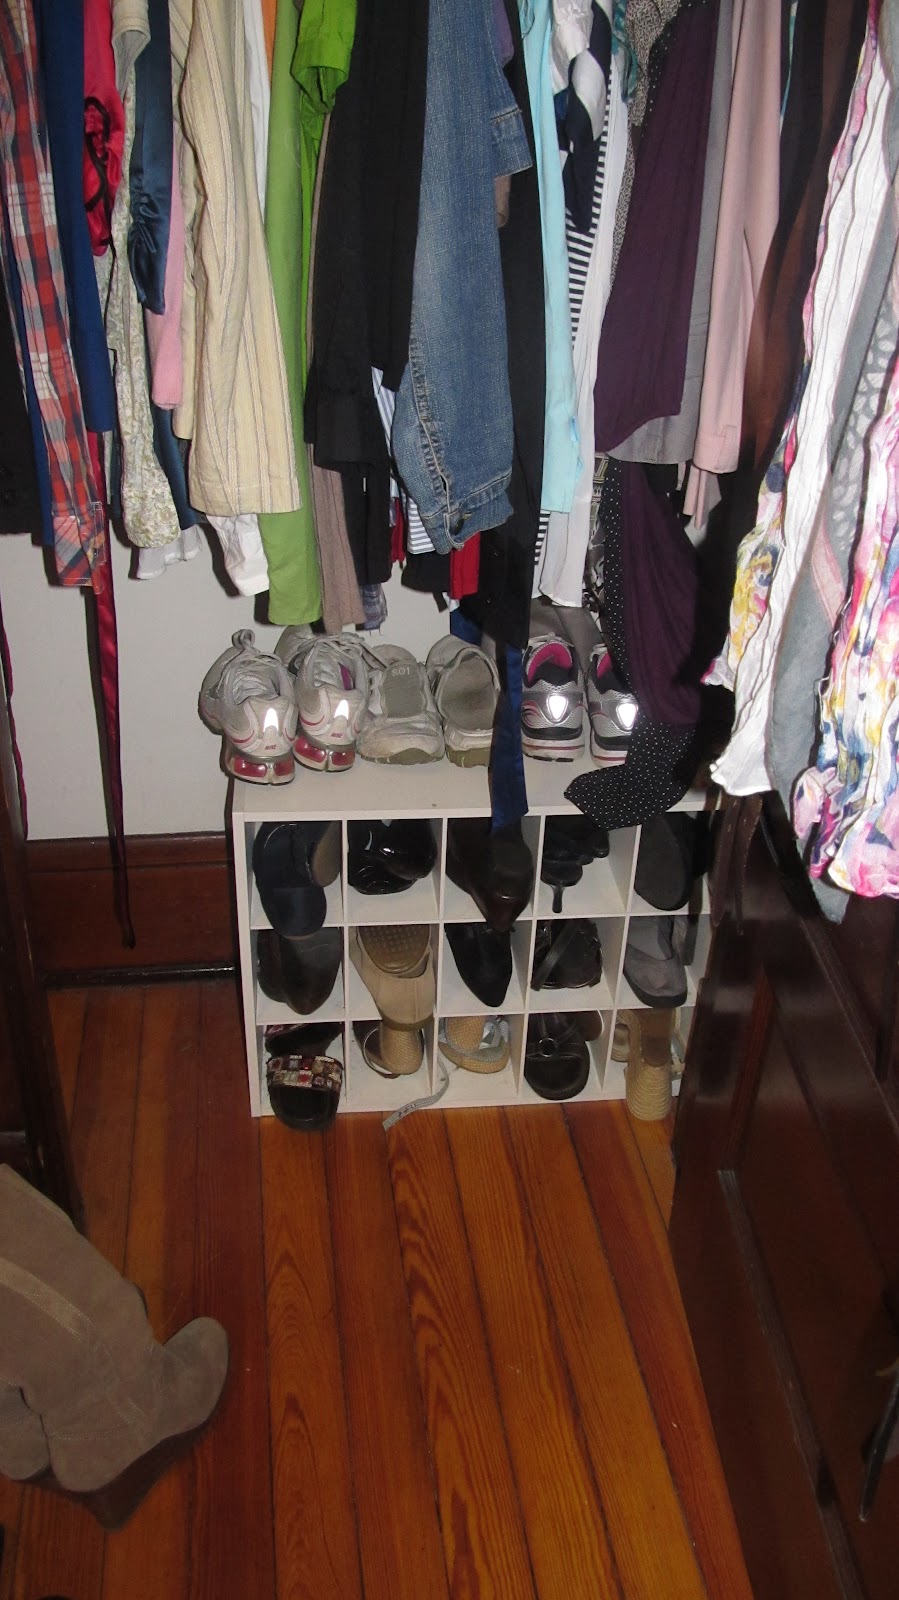 |
| Running and tennis shoes on top and other shoes throughout- doesn't include the ones I keep down stairs that are my usual go to shoes. |
 |
| My boots: Red/Brown westerns (under the gray), Gray (my new fave), Tan Wedge heels, black kitten heels, brown suede-like 3 inch heels, and cute little black booties. |
I was supposed to get my 10 favorite things, but I don't really know what they are! Guess I'll be peaking in the closet a little longer every morning until I figure that out!
OH! I have to say in reading the book, I noticed there is a mention that 50-60 articles of clothing is plenty. I thought that was a lot.... until I started counting how many were jam packed into the closet. It's also important to know that there are clothes in my 2 dressers and bins upstairs that are off season clothing (dwindled down to 1 bin instead of 2) as well as clothes in the laundry (you know how that cycle never ends!).
Now I'm moving to the organizing/categorizing/purging the closet phase. Mind you, I just assembled 2 bags of clothing to send off somewhere 2 weeks ago. Some of the clothes had tags on them. I've had them for a year or more and never wore them because I didn't like the style or material. Like I said, a lot of what I have is hand me down or gifted clothing. I don't mind it, it just doesn't always work out. I'm learning not to feel guilty about that! I'll be back Wednesday with a post on what I've gotten rid of and what I'm keeping.
Also, if you're interested in purchasing a copy of the book to learn more about what's happening here and help yourself through the process, click the button on the right. You can also visit The Tiny Twig's 31 days series about The No Brainer Wardrobe here. If you haven't read The Tiny Twig, you really should. Hayley is amazing and I don't even know her personally, but I would love to be her BFF. :) So inspirational.
Sunday, March 18, 2012
A Good Surprise???
For the past few weeks, my husband has been talking about putting the TV up on the wall instead of using the TV stand we bought from Ikea a few years ago. I must admit- I am not a fan of TVs on the wall. UGH! They are not very attractive hanging there. Of course, they're not attractive on a TV stand either, but at least there aren't exposed wires and such.
One night last week, my husband decided to call up a friend and rearrange the living room to mount the TV to the wall and open up the room. I'm all for opening up this room. It's a long skinny rectangle and can be hard to work with.
There was a large hideous nonworking fireplace in the room a few years ago. It was literally about 3.5 feet deep, 4 feet wide and 4.5 feet tall. It took up a LOT of the room. I really wanted to keep it and fix it up to work with it, especially if we could get it working. I called out some chimney guys and we found that there was no way to get it working without spending $1500. I'm not spending that much on something I'm not fond of. So, hubby and I knocked it out and put up shelves to change up the room. (I know, many of you are screaming, but really, if you had an ugly brick nonworking fireplace that took up 1/4 of the room, you would have made a similar decision (I think)). Here it is after we finished it.
Anyway, as I was saying before I ventured through a time warp, hubby on a whim decided he wanted to change up the room. I'm all for change, just hate the fact that the TV is possibly going to be hanging on the wall. Yes, it makes sense and everyone's doing it, but I go against convention at times.
So, the guys came over and they started working... and they worked and worked and worked. I didn't think it would be so much work, honestly. I woke up at 1:30 to the sound of drills. Yes, 1:30 A.M. The house was a MESS (notice the capital, bold, italicized letters). I peeked down the stairs (as you see lil man doing in the pic above). I almost fell down them in shock at how big of a mess there was. Mind you, lil man was asleep upstairs. If he would have woke, I'd have been pretty doggone ticked. Yes, I get that way in the middle of the night when I'm woken up by noise only to find a mess everywhere.... (breathe, breathe)... I'm okay now...
I figured they were done. The TV was on the wall and surely all they need to do is clean up. Right? Imagine my surprise on Sunday morning when I wake up to a kid with a fever and a downstairs that looks like this: (Needless to say, I wasn't pleased and this wasn't a good surprise)
It was clearly a mess. However, I know it often takes making a mess to make something better and more organized -right? I mean, you can't organize a junk drawer with the stuff in it- or can you??? Not the the living room was a large junk drawer.
After a week of working off and on on the project (It's hard to get everything done in a day when you work full-time), this is what it looks like:
This is a much better surprise to come down to. A nice, clean, organized living room.... Ahh....
As you can see in the pic above, there are still exposed wires we need to fix. Hubby's working on it. The majority of what we have in the room are things we had, found thrifted, were given or got a great deal on. I loved that we were able to reuse the shelves in other places. Now to just clean up a little of those wires and darker things. Maybe I could make a cool TV cover/artwork like Maria at John's Journal did with hers.
Although, I'm not sure what would happen with that painting when the TV was on, which is every night. It might get to be a pain to remove and replace all the time. Still considering it though.
So, what are your thoughts- pleasantly surprised/none-to-pleased? I'm curious! :) Leave a comment below.
Oh! I do know it seems weird that I tagged this in 2012 goals, but we are getting organized through this project- Now to tackle that ugly Little Tikes toy box into something else.
One night last week, my husband decided to call up a friend and rearrange the living room to mount the TV to the wall and open up the room. I'm all for opening up this room. It's a long skinny rectangle and can be hard to work with.
There was a large hideous nonworking fireplace in the room a few years ago. It was literally about 3.5 feet deep, 4 feet wide and 4.5 feet tall. It took up a LOT of the room. I really wanted to keep it and fix it up to work with it, especially if we could get it working. I called out some chimney guys and we found that there was no way to get it working without spending $1500. I'm not spending that much on something I'm not fond of. So, hubby and I knocked it out and put up shelves to change up the room. (I know, many of you are screaming, but really, if you had an ugly brick nonworking fireplace that took up 1/4 of the room, you would have made a similar decision (I think)). Here it is after we finished it.
 |
| The fireplace took up where the TV and half the chest are in this picture. It was up to the bottom of the top picture. |
 |
| This is the view of the room from the shelving. |
So, the guys came over and they started working... and they worked and worked and worked. I didn't think it would be so much work, honestly. I woke up at 1:30 to the sound of drills. Yes, 1:30 A.M. The house was a MESS (notice the capital, bold, italicized letters). I peeked down the stairs (as you see lil man doing in the pic above). I almost fell down them in shock at how big of a mess there was. Mind you, lil man was asleep upstairs. If he would have woke, I'd have been pretty doggone ticked. Yes, I get that way in the middle of the night when I'm woken up by noise only to find a mess everywhere.... (breathe, breathe)... I'm okay now...
I figured they were done. The TV was on the wall and surely all they need to do is clean up. Right? Imagine my surprise on Sunday morning when I wake up to a kid with a fever and a downstairs that looks like this: (Needless to say, I wasn't pleased and this wasn't a good surprise)
 |
| AHHHH! no place to sit and cuddle lil man! |
 |
| Be careful walking on the open floor! Parts everywhere! |
 |
| Oh boy! |
 |
| Then to see it spill over to the dining room (which needs finished)!!! |
 |
| Really???? |
After a week of working off and on on the project (It's hard to get everything done in a day when you work full-time), this is what it looks like:
 |
| View from loveseat and old fireplace wall. |
 |
| Removed some shelves (for under TV) and lowered these. View from entry/stairs |
 |
| My favorite things: those awesome green chairs- more on those later. |
As you can see in the pic above, there are still exposed wires we need to fix. Hubby's working on it. The majority of what we have in the room are things we had, found thrifted, were given or got a great deal on. I loved that we were able to reuse the shelves in other places. Now to just clean up a little of those wires and darker things. Maybe I could make a cool TV cover/artwork like Maria at John's Journal did with hers.
 |
| Image from John's Journal |
Although, I'm not sure what would happen with that painting when the TV was on, which is every night. It might get to be a pain to remove and replace all the time. Still considering it though.
So, what are your thoughts- pleasantly surprised/none-to-pleased? I'm curious! :) Leave a comment below.
Oh! I do know it seems weird that I tagged this in 2012 goals, but we are getting organized through this project- Now to tackle that ugly Little Tikes toy box into something else.
Sunday, March 4, 2012
Saving Myself in the Kitchen
Many of you know me as a couponer. I have a confession, I'm not couponing as much as I used to. Whew, did that feel good to get off my chest. I feel slightly guilty about it, but I haven't stopped altogether, I just don't let it take as much time as I used to. Not that it was that long, just that while working, I can't do it all any more. Another reason is because my lil man has food allergies which encourage us to eat more fresh foods and foods that are allergen free. Let's face it, it's not frequently that you get coupons for organics (yes they are out there but not in abundance) and fruits and veggies.
My life changed when a friend introduced me to www.kristaskitchen.com- a great cooking blog by a chef in this area. I started to peruse her site to get ideas for meals for kids with allergies. There weren't a ton, but there were many recipes that I wanted to make despite the fact that they are not E friendly. So, I did. In the process, I stumbled upon her posts about meal planning and how it helps her keep her budget down, organized, etc. I decided I would try it because I was sick of getting home and not knowing what I was going to cook. (Anyone else feel me there?) I mean, I have 2 boys (hubby and lil man) who want meat and potatoes, not a bagged salad with frozen Tyson chicken on top. Not only that, let's face it, going out to eat gets boring and expensive.
Meal planning revolutionized my kitchen and cooking experience. Where I wasn't excited about being in the kitchen before, I was now getting excited. I knew what I was doing and made sure I had all the ingredients (imagine that! Some days I still miss something- hubby will testify to that). Everything is beautiful and efficient with meal plans. The meal planning not only made me more organized in the kitchen to know and have everything ahead of time, it also started to change my shopping routine. Instead of buying a myriad of things that I may not need but seem interesting, everything had a purpose. I was actually saving money because I was buying what I needed for meals instead of just what was on sale but I couldn't make a meal out of. I still clipped coupons and still do, I just don't make it the number one priority anymore.

Meal planning has made it to where when hubby asks what's for dinner, I can easily spout it off or simply say "look at the calendar". I love it! Oh! Yes, I write the meal plan on my shopping list then transfer it to the calendar that hangs in the kitchen by the fridge so I know if I need to put anything out to thaw or not.
How often you plan for is up to you. I plan for 7- 8 days (just in case I don't go to the store on my regularly scheduled Sunday afternoon trip). You save more money when you plan around the sales at your grocer. You'll be more prepared for pot lucks (at least if you know in advance). There are a lot of pros to it. You don't have to feel like you have to make something new each week, but if you want to, this allowes you to. You could even do themed nights (Taco Tuesday, Meat free Monday, Free Friday (left overs, pizza, etc), Wacky Wednesday (new recipe night)). I don't really do it this way. My cheat days are Fridays and Sundays for the most part. Definitely Sundays. I don't really cook that day with preparing for the week.
The one thing I learned in the past 5 months I've been doing this is that it's best to leave at least 1 day for left overs and 1 day for an easy meal (grilled cheese and soup, breakfast, whatever). You'll be eating out less often by meal planning and feel good about what you're doing. Give it a shot for a month and see what you think.
Tuesday, January 31, 2012
How to- Necklace organizer
Remember the post about the necklace organizer? Here's the how to.... So simple, so easy!
Step 1: Gather your supplies (cork board, fabric, scissors, stapler with staples, hooks for hanging or 3M strips if they work in your home because you have drywall walls - not plaster, and cup hooks).
Step 2: Wrap and smooth out the fabric around the corkboard.


Step 3: After making sure the fabric is smooth, staple it in place.

Step 4: Attach the hooks for hanging. The type varies on your taste. I chose saw tooth. They were $1.

Step 5: Insert the cup hooks. Sorry, I forgot the pics for this!
Step 6: Hang

Step 7: Add jewelry. I have necklaces and bracelets on here.

Step 8: Stand back and enjoy it. :)
Friday, January 27, 2012
Getting organized: Necklace Organizer
Oh the frustration of tangled necklaces in a jewelry box. That's why I am not a jewlery box person. I would constantly want to wear the necklace in the back and when I rotated the necklaces around, they would all tangle together. Now, I love the jewelry box I had because it was given to me by my grandma who passed away almost 14 years ago. But, I really cannot use jewelry boxes effectively.
I had been coming up with all kinds of ideas to make my own jewlery organizer. Some included a towel bar with shower cutain hooks to hold the necklaces. Some were frames with the backing out of it and ribbon in it's place. Some were cork boards with pins to hold the necklaces. Larger armoire type jewelry boxes. So many choices, but what was most cost effective and useful for me?
Well, I decided to use corkboard covered in fabric and cup hooks to hold the necklaces. Here's how it turned out:

 A how-to will post next week. It will have step by step instructions. Altogether, this cost me $14. So worth it. Of course, I could have waited another day or two to buy the large piece of corkboard for an additional $4 off, but I wanted to get this done before the craft party and I returned to work!
I love it. I love the fabric for it (thank you cousin). I love that it fits in that room perfect. I just think it's grand! So glad I did this. I can see everything and everything has a place. That's soooo nice! I'm just working away at this 2012 goals. How are you doing with your goals?
I had been coming up with all kinds of ideas to make my own jewlery organizer. Some included a towel bar with shower cutain hooks to hold the necklaces. Some were frames with the backing out of it and ribbon in it's place. Some were cork boards with pins to hold the necklaces. Larger armoire type jewelry boxes. So many choices, but what was most cost effective and useful for me?
Well, I decided to use corkboard covered in fabric and cup hooks to hold the necklaces. Here's how it turned out:


I love it. I love the fabric for it (thank you cousin). I love that it fits in that room perfect. I just think it's grand! So glad I did this. I can see everything and everything has a place. That's soooo nice! I'm just working away at this 2012 goals. How are you doing with your goals?
Wednesday, January 25, 2012
Getting Organized: Earring corralling
I really struggle with jewelry organization. I usually just let them sit on my dresser top. This has become dangerous with a toddler around. I've lost many earrings from a cute lil toddler who likes to check things out. Needless to say, I was sick of losing earrings.
I was searching all kinds of cute things and pinning great things on pinterest to make, but I really needed to do something STAT! Thank goodness for TJ Maxx. While perusing the store one day, I found this:


Look how cute my earrings look hanging there. So much better than anything else I saw. Was it cheap? No- not by my standards. It cost me $12.99... but the peace of mind that I know where my earrings are and things are cleaned up is worth it!
I may paint it but for now, I'm letting it be. I like the little tray under it for my rings and bigger bracelets that don't work on my necklace/bracelet organizer (post coming soon). So glad I went to TJ Maxx and found this! Plus, it goes with the garden theme in the room.
What do you do to store your earrings?
Friday, January 20, 2012
Getting Organized - Family Command Center
One of my goals for 2012 is to get organized. I'm taking this a little at a time (of course). We had have a junk drawer that was filled with pens, markers, scissors, tape, twine, and any other miscellaneous items you could imagine. I'm sure we're not the only ones like this, but I needed to start to corral things so that like things were together. All the pens were taking up the majority of the drawer. We also needed to organize mail, write the meal plan, a calendar for important appointments/activities, a place for note cards of a pad of paper and pens (easy to find working pens) so we could quickly make a list. So, I was reading The Complete Guide to Imperfect Homemaking's October 31 days series and came across this post about command centers. I knew I needed to do it!
In the post, Kelly had great ideas. I needed something simple and space saving. Enter Landee See Landee Do with the following:
I loved it! Not only did I love it, but I could do it! So easy and on the side of my fridge? I'm sold!
Here's my version of this command center - Mind you, I only have the side of the fridge, not a wall covered in steel- don't I wish I did!


This was modified for our family. I have a white board (1 of 35 I bought for my classroom- well made out of showerboard) for messages, grocery lists/needs. The green box is from Target and cost $4.50. It holds key notes for things (window measurements, room measurements - things I'm always looking for), blank index cards for lists or recipes or whatever, my sharpie for freezing food, and dry erase markers for the board. The pen holders are cans covered in scrapbook paper that match the mail holder that is on the other side of the fridge. The pen holders are held on by magnets from Walmart ($3). The calendar hanging vertically is our family calendar/meal plan calendar. I write out the meal plan and any appointments/events on it. This has worked for us for a year. If it ain't broke, don't fix it is my motto. The bottom calendar is for lil man. He uses it to color while I cook and do food prep.
Lil man's calendar will be moved eventually and I'll put his laminated chore chart and some toddler/preschool activities (maybe a magnetic board for matching colors, etc) in its place.
Is it as beautiful and Pinterest worthy as Landee's, probably not, but it was cost effective and works for my family which is what is most important! So easy to do and cheap.
In the post, Kelly had great ideas. I needed something simple and space saving. Enter Landee See Landee Do with the following:
 |
| So cute right??? |
Here's my version of this command center - Mind you, I only have the side of the fridge, not a wall covered in steel- don't I wish I did!


This was modified for our family. I have a white board (1 of 35 I bought for my classroom- well made out of showerboard) for messages, grocery lists/needs. The green box is from Target and cost $4.50. It holds key notes for things (window measurements, room measurements - things I'm always looking for), blank index cards for lists or recipes or whatever, my sharpie for freezing food, and dry erase markers for the board. The pen holders are cans covered in scrapbook paper that match the mail holder that is on the other side of the fridge. The pen holders are held on by magnets from Walmart ($3). The calendar hanging vertically is our family calendar/meal plan calendar. I write out the meal plan and any appointments/events on it. This has worked for us for a year. If it ain't broke, don't fix it is my motto. The bottom calendar is for lil man. He uses it to color while I cook and do food prep.
Lil man's calendar will be moved eventually and I'll put his laminated chore chart and some toddler/preschool activities (maybe a magnetic board for matching colors, etc) in its place.
Is it as beautiful and Pinterest worthy as Landee's, probably not, but it was cost effective and works for my family which is what is most important! So easy to do and cheap.
Subscribe to:
Posts (Atom)