background

Showing posts with label Craftiness. Show all posts

Wednesday, July 9, 2014

An amateur's view of painting furniture.

It all started when I saw a dresser on a curb.. sitting there... lonely..... deserted..... looking pathetic. I stopped. I'd seen dressers people had refinished and I wanted a buffet or something for in the dining room. It was 2 houses down, had good bones and I decided I needed it.... well, wanted it. I figured I could give this furniture venture a try and see if I can actually refinish or makeover a piece of furniture. That was last August.

What I didn't know about that piece of furniture was that it was going to lead me into a hobby I both love and hate. I love how everything looks. I love picking out paint colors. I love seeing a transformation and being the creator of that transformation. I love sanding paint off to find what lies underneath. I love looking at hardware and painting by hand. Yes, I have painted all of my furniture by hand. I hate how long it can take and that can take time away from my little boy... however, it is an escape for me. Believe it or not.

By the way, that dresser turned out absolutely lovely. So much so that a friend asked me to paint her piano despite the fact that I had only refinished one piece, she trusted me with her daddy's piano. I must admit to being totally intimidated.

I was correct in being intimidated with the piano. There were some stains and rough patches. It needed some serious TLC... It taught me so much. I am so thankful for the opportunity. More to follow on what I learned from each piece below.

Before... 


After... 

Closer up of the damaged area

Another midrange view.


The last piece of furniture I did, my third piece, was in need of serious TLC but again had good bones... Oh and did I mention that it was at the same house from which the first dresser came from?? Again, sitting lonely and pathetic on the curb for over 24 hours (I was out of town when it was put there)... clearly it was meant for me to refinish....

Before

The rotted back... the only thing aside from a drawer that I thought was wrong...

Front view... Forgot to get a back view... maybe I will today...


This dresser taught me much more than I had ever thought of before. Because of the rotted out bottom, broken tracks for the bottom drawer and rotted out back, I learned to use a jigsaw and circular saw. I now feel unstoppable!

FYI the total cost for this dresser including paint and such was $12. Doesn't include the amount of time spent working on it (at least 4 hours a day for 3 days- includes drying time on paint and primer and poly).

Lessons I've learned... piece by piece:
Dresser 1:
1. I love doing this work.
2. It's hard work.
3. It can take a long time and a lot of prep work.
4. The outcome is so worth it.
5. Chalk paint is so easy to use.... the wax not so much.
6. I love staining things.
7. Polyurethane is a pain, but such a lasting finish.

Piano:
1. Sometimes even with chalk paint you have to prime a piece.
2. Cover stain primer (oil based) is a pain in the rear to work with, but does a fantastic job. When I started the piano, I didn't use any primer because truly you don't need to with chalk paint - so they tell you... and I didn't for dresser 1 but that was a darker color. I'll explain more in a post tomorrow.
3. It was fun to tear apart the piano and clean it all out- goodbye spider webs.
4. Working in a garage is not my favorite things, but it does suffice. I prefer open air but I can't move a piano by myself!
5. Chalk paint is wonderful, but can be temperamental... maybe I should try latex for the first time on my next project.
6. Polycrylic is my favorite. Shorter dry time and just as easy an application as polyurethane without the yellowing effect.

Dresser 2:
1. Don't be afraid to tackle a harder project. It teaches you so many new things that help you gain confidence.
2. Primer is your friend.
3. Sometimes crackle paint is your worst enemy... It gummed up the sander... peeled off in smaller pieces (when there was a large piece, I was stoked).
4. Using latex for the first time... it went on easy but not as thick as chalk paint (which I still prefer but not at the price they sell it).
5. I still love polycrylic.
6. Hobby Lobby has lovely drawer pulls at a price, but Habitat Restore has some good ones to use as is or paint for a fraction of the cost.

So, you have your eyes set on a piece of furniture you want to refinish... Go for it.

 For the least labor intensive work, I can't tell you what to do. I know I have used Annie Sloan Chalk Paint and said it's easiest but the piano taught me that isn't always the case. They say you can just paint over whatever with chalk paint. My experience was I couldn't really with the piano due to the stain. There is a disclaimer made by the ASCP company that some stains put on furniture during a certain time period can lead to bleed through. Let me tell you that is totally the truth and when that happens, you must get out the cover stain primer. It must be Cover Stain. I tried a different primer first and it didn't work. Imagine repainting something 4 times.... Yep, that's what I learned with the piano. Use cover stain. It's a pain... it stinks... it's gives a lovely finished product because it gets the job done.

I will say I love the look of furniture covered with Annie's Chalk Paint, a nice velvety finish... It was easy to use with the first dresser where I covered over black paint with no problems. Covering over something with stain was a bit more challenging. Latex was nice and easy. Easy clean up (chalk paint is easy clean up as well) and cheap... cheap.. cheap.... I'm not sure on the durability of it as I just did this project. I know the dresser with chalk paint is still going strong... as in not easily chipped off or anything.  I pray the latex paint does well after a year as well.

Overall, when you set out to paint furniture, you may love it or hate it. If you're one of the people I've spoken with about painting furniture, you may swear at me and curse me and hate my guts when going through the process... depending on how you go about it. (Are you sanding??? staining??? Polycrylic? Polyurethane?? chalk paint? Primer?? Latex paint??? Spray paint???) It's all so overwhelming!

Tomorrow I will set out to give pointers on painting furniture when you're just getting started... from an amateur's point of view... because that's what I am....


Saturday, August 4, 2012

Making the menu pretty!

I love my command center. The white board with the pen holder and notecard holder for jotting down messages when the menu was on the white board etc. I just didn't really care for the white board as the menu spot. Why, I couldn't tell you.

One day, hubby and I were cleaning out a room and I came across an old mirror that was kind of stained and had a fog on it in spots and some yellow dots on it. I didn't want to let it go as I liked the styling of it. It's quaint and could easily have a new purpose. So, I figured I would turn it into a menu board in the kitchen.

Yep, them are my legs and the crocs flip flops I've had for over 5 years. Love those things!

With a little primer, left over white paint from the trim in the dining room and chalkboard paint from E's playroom, I took to turning the mirror into a menu board. I chose to use the white paint because it goes with everything (we plan on repainting the kitchen in the next year or two so I can update it then) and because I had a lot of it available!

In a matter of 2 days, I had a new menu board. Next it was where to hang it. I decided I would put it right by the back kitchen door above our current ginormous trash can (one day we'll hide it away and use a small one that fits into a pantry or something). Confession, the trash can is not ginormous, it's 13 gallon capacity just sits on the wall by itself beside (and behind when open) the kitchen door.


No, I didn't take a pic of that corner as it needs cleaning and I didn't feel like doing it before snapping the picture.

I love where I hung it as I can see exactly what I need to do and if I forget on the way out in the morning, there's a quick reminder for me to do a 5 second turn and get whatever from the freezer for dinner that night or the next night. So nice!

Best thing, this cost us nothing as we already had everything from previous projects! :) Yippee Skippy!!!

Tuesday, July 17, 2012

Button Love...

I've had a great few weeks. Some of my projects that were on my list of things to do are getting done. Not many, but a few. Really, truth be told, I'm just enjoying my time with lil man. He's so fun- sometimes out of control, but you'll have that with 3 year old little boys. I wouldn't have it any other way.

One of the projects on my list was the button bracelet I started at the May Craft Day... yes, I still hadn't finished. I can honestly say, I want to add about 4 more little buttons (when I find some I like in the huge stash of buttons lying around my home). I hadn't been feeling creative until the past 2 weeks. Now I'm in a groove and getting things done. One day when I had finished an amazing book (I'll blog about it soon), I needed to just process things in it and get myself back to reality. In order to do so, Hubs and I turned on Season 1 of Game of Thrones (which I actually liked and now want to read the books- I never want to do that after watching something in a movie/tv). I grabbed my needle, thread, band, and buttons and began working away. In 2 episodes, I had completed my bracelet (save the 4 small buttons that I need to find.


I totally love it! I put a Mickey Mouse button on there for my son who loves Mickey. Other than that, the buttons are just ones that I liked and in a variety of colors. I can wear this with almost everything! Love those types of pieces.

Next up, maybe a necklace, some canvas work with initials and symbols relevant to us to be used as artwork. I love it!

Friday, July 13, 2012

Teaching 'im young...

Remember the cool scarf I made at the Parks and Recreation department? Well, I saw they offered classes for little ones too. One of them was called Mudpies. It's a clay class for kids 3-5. For $15, you could enroll your child in the class 1 day a week for 3 weeks and 45 minutes each day to teach them how to work with clay. Well, I was all over that! How cool would it be to get some gifts for father's day made and possibly for other holidays as well?

I wasn't sure what to expect, but I must admit, this was so much fun and lil man looked forward to it every Thursday. Miss Amy, our instructor, taught us how to use the pottery wheel, join clay together, make finger pots, leaf rubbings and other fun things. It was so much fun. There were 4 other kids in the class who seemed to love it as well.

My son most enjoyed getting to roll the clay with what we called the "steamroller". I don't know the real name for it. It was a table with wires and a roller and handle. By rotating the handle, the roller moved over the clay to smash it down flat. So fun for little boys and girls who love steamrollers... or smashing things.
Playing the role of the steam roller

First time using a pottery wheel.

soaking up the extra water in the bowl with a sponge... he didn't like doing that.

Where to place the paint.... hmm...

Right there....

The first week, we made pinch pots, handprint plaques, leaf imprints and whatever else "came into our head". The second week, we made frogs and more of whatever else while making bowls on the pottery wheel. The third week we spent painting and glazing. In all, we ended up with 7 items my some made. It was so much fun for both him and me. We will definitely do it again!


Gifts: one for Daddy and one for Grandma

First bowl - week 1

second bowl... week 2

handprint and frog...

An owl for mommy.

adding texture to the handprint.

Wednesday, July 11, 2012

I'm Batik!... I mean, back!

Back in April, I took a class on how to make a Batik scarf. Oh, you didn't know this? That's because I forgot to tell you. I haven't been in a blogging mood lately. Nor have I had motivation or a creative bone in my body. I don't know what happened, but the end of the school year through now has just had me in a funk. I feel I might be getting my groove back, but we'll see.

One of the great things about where I live is the Parks and Recreation Department. It's truly amazing what all they offer. We have 6 parks in the area with playgrounds, wading pools, and sand boxes. They offer classes for all ages ranging from sports, to cards to dance to crafts. As I said, in April, I took a class on how to make a Batik scarf. The course fee was $15 and the registration fee was $2. So for $17 I was going to make a scarf. It's about what you would pay for a scarf at the store (unless you hit up Burlington which has amazing prices on great scarves). But the best thing, I design it and create it myself.

This was the first craft class I had taken. Walking into it I had some anxiety. What if I was the oldest person in there? What if I was totally crappy at this? What if my scarf didn't turn out and I ended up making a mess out of something so beautiful and wasting my $17? Calmed by dear friends and the hubby, I set out to the class. I was 2 minutes late... oops.

I was not the oldest... I was the youngest.

I was not crappy at it... I had more compliments that any and an offer to buy my scarf.

My scarf did turn out. I did not waste $17.

Most importantly, I had FUN!

I sat in the class with a bunch of retired women (a few school teachers) and we talked about whatever. We helped each other. It was so great. I realized how much I love talking with women who are wiser than me. I realized how much I love to make things in fabric. I realized I loved being me.

I used a favorite Zentange design. :) The dark green is supposed to be white, but I had to dye my scarf a few times to make it not as flourescent as it initially was. So that lead to dye leakage.

Love it!
It was a great time. It was cheap fun. I immediately asked when the next class would be so I could sign up to make another scarf. It was great!

Thursday, April 19, 2012

Pretty lighting

I have a thing for jars. The sad thing about it is I don't have much storage space for them. I keep those I can on the very top shelf of my cabinet- a space so high that they are out of the way. Recently, I was running out of room for jars and needed to do something with them. I searched the net for new ideas for mason jars. I came across some really cute lace covered jars that house votive candles at Anna Boo's House.

Since my cousin was getting married, I thought these might be cute for center pieces since she wanted something simple. I went ahead and got the lace for the jars and made some up. It took me a while to get to this project as sometimes happens.  For whatever reason, I hesitated in getting around to them. They didn't take long at all! It was simple and easy. I'll explain how to do it after I show how cute they are lit and unlit! :)


So easy to do, fairly cheap and quick!

You want to make one of your own you say? I'll tell you how I made mine.... Please forgive me, I forgot to take pics of a couple of basic steps but I think you'll forgive me as they are really simple steps.

Supplies:
Jars any size and clean. I simply use jars from salsa, pasta sauce, etc.
Lace- amount depends on the thickness, how many layers you want to do and size of jar. I went with 1 yard for each jar even though I knew it would be too much. I like left overs as I can use it for other things.
Spray adhesive
Scissors
Flexible measuring tape.
Newspaper

1. Measure the circumference of the jar.


2. Cut lace at the length needed to go around the jar.

3.  Put newspaper down and place lace laying flat on the newspaper.

4. Using spray adhesive, spray one segment of lace and quickly wrap around the jar.


5. Repeat the steps for each segment needed to complete the jars.

6. Allow to dry

7. Insert votive candle, light and enjoy the ambiance of candle light in unique designs as it flickers on the wall.


Ta-da! Not to mention, these would be cute gifts for teachers, housewarming, etc.

Monday, April 16, 2012

March craft party and give away!


*** Winner announced here***

Every month I host a craft day. The crafts are generally pre-arranged so everyone is aware of what we'll be doing and for the most part, the ideas come from Pinterest (bet you couldn't have guessed that!).

In March, I hosted a jewelry making party. We made earrings and birds nest necklaces. I can take absolutely no credit for knowing anything about jewelry making- although, now I know a little so watch out! I invited my husband's creative cousin to come over and help us with our jewelry making venture. This wonderful man has made jewelry and sold it so I'm all for help from an expert- even if you dabbled in jewelry making for a week, you're an expert in my opinion! The good thing, Chris had more than a week's worth of experience so he was REALLY good!

The day started by learning to make earrings. We each made 2 pair of earrings that we got to keep. Then Chris showed us the birds nest necklaces he made to demonstrate for us how to do them. We each sorted through billions (no exaggeration there) of beads, chose our wire color (brown, copper or silver) and followed his instructions. These necklaces did not take long and I must say we had to call on Chris a little to help at the beginning and end to make sure we were following everything as planned so the necklaces remained intact. I kind of felt for him as we all needed assistance at the same time! :) He is so patient.

Here are the pics of the day- not taken by me, but by my hubs so please forgive the quality. He believes in AUTO mode and I'm working my way out of it. Of course, thanks for your understanding when I take pics too though!


If you can't find a sitter, bring the kids. It adds to the fun. Dads have been known to hang out and watch them or watch TV while the kids play around them. It's fun for all!

This proves that the kids love spending time playing together. Fun isn't had until the house is covered in toys.

My collection. Yes, one of these will be given away

My necklace that I made. Wish it wasn't so blurry and I'm too lazy to go up and take another pic.

Pretty silver necklace and the proud creator! 

Matching earrings.
We all had so much fun. Afterwards, those who could go went with us to a winery while the teens watched the kids. It was such a great craft night.

Yes, I mentioned a give away. I'm doing a giveaway of one of the copper birds next charms- below. You have a chance to win one to own and sport!  You would need to get a chain for it. In order to win, leave a comment below. Simple as that. It would be more fun if you let us know what crafts you like or if you have ever hosted or been to a craft party. What did you make???


All entries must be in by Friday, April 20, at 8 PM. Winner will be announced Friday night!

Wednesday, April 11, 2012

Pinterest Success- Again!

Golly, I have to admit I enjoy Pinterest. It's a great site for ideas- if you aren't already aware of what it is. It is essentially a bookmarking site for your favorite things, but it allows others to see what you're "pinning" to your online cork board/idea board. If you don't have pinterest access yet, send me an email (sharingcheri@gmail.com) and I'll give you the hook up.

Anyway, I pinned a sunburst mirror from Our Humble Abowed, well, it was actually a pin a friend had and I repinned it as something I wanted to make.


I followed the tutorial and here is what I got:

Oh fantastic... beautiful... wonderful...


Brightens my day....


Love love!


I can't believe I did this!!!!

I LOVE IT! It's one of my favorite pinterest things thus far and I've made 5 pinterest "crafts". I love the colors too. They go so well with the curtains. I hung it temporarily just for the pics. I want to hand a better picture hanger on the back and if it stays in that spot, I'll have to move it down a little.

It makes me happy. The hardest part of this is gathering the sticks and cutting them down. I used a hacksaw and mitre box for my cuts, but the tutorial shows wire cutters work well too. I was nervous about my spacing and making sure to glue everything in the right place. There was one spot where things were tight, but you can't tell when it's up.

The whole project cost me $2.80. 2 paints were $0.39 each with coupon at Michaels and the mirror was $1.99 with coupon. I used a 10" mirror instead of a 7" as shown in the tutorial. I only needed to use 50 sticks which is the same she used in the tutorial.

Funny story about the sticks. I asked the woman at the paint counter at Walmart (a store I can't stand but that is 5 blocks from my house- literally) if I could just buy some cheaply. She said no to just take what I needed. I didn't want to hoard so I grabbed 15 the first time then 10 on subsequent trips until I hit 55 sticks (just in case I cracked one or something happened like a 2 year old decided they were drum sticks).

I love it. It's my favorite thing in the dining room. What do you think???


Sunday, March 18, 2012

All Tangled Up!

Remember how I said I was going to take a Zentangle class at the library? Remember how I was nervous I would be the oldest there? Also remember how I was nervous I wouldn't be able to do it? If not, go here; however, I did it, I made a fun Zentangle, I wasn't the oldest!

So, on a beautiful Saturday afternoon, I headed over to the library for the class I registered for. I was excited (kind of bummed for being inside on a nice day for an hour). I walked in and introduced myself. Only to find I was the only person there up to 3 minutes before class began. Eventually, 2 other women walked in. Both were older than me and seriously creative and artistic people- something I'm not, but I'm trying to tap into these abilities.

I was certainly not the oldest. In fact, I was the youngest! Yippeeee!!

The instructor, Carole Bailey-Floyd, was such a delightful and unique soul. She was so encouraging and optimistic about my ability to complete a Zentangle.  I was seriously afraid that I would disappoint her.

In the class description, it stated to contact her for registering for the class. I did. There was no mention of a fee for materials or anything, so I brought what I thought I would need- pen and paper. Imagine my surprise when I get to the library cashless and Carole passes out the materials we'll be using while collecting the class fee. Insert sheepish grin here as I mention that I do not have any cash (or checks) on me, which is my MO. Carole was fantastic about this. She simply gave me the materials, said don't worry about it just send a check in the mail to her sometime. How gracious is that! Then she told me not to fret and just relax and enjoy myself.

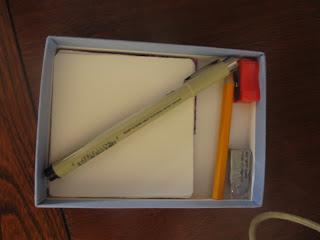
The materials were wrapped up in these cute little purple boxes. When you opened, there were 2 purple business cards, a small pencil, pencil sharpener, artist's eraser, 3 Zentangle tiles (9cm square piece of paper), and a cool micron 02 pen. What a beautiful presentation. Then she passed out step by step instructions for 8 patterns.


I heeded her advice and had a TON of fun while creating a fantastic little diddy. It's not perfect, it's not supposed to be. It's simply something I made and had fun doing. In one hour, I learned the history of Zentangle, history of the teacher, history of other students, and created my first Zentangle.
My first Zentangle.
At the end of the class, we ccombined our creations and stated what we liked about each one. I was so glad that they found things they liked about mine, especially since one was a graphic artist and the other was a painter or some kind.

I didn't get enough time to finish coloring in what I wanted, but easily completed that at a restaurant that night while hubby was playing a game of pool with friends. The unfortunate thing was I lost the lid to my box! It was accidentally thrown away when I went to the restroom and the waitress cleared the table. Now, I'm in search for a new little box to carry in my bag and pass time while waiting for things. This is a great way to pass time if you don't have a book or simply want to do something other than read.

If you want to learn more about Zentangle, visit www.zentangle.com.

Wednesday, February 1, 2012

January Craft Party - T-shirt necklace

One of the 2012 goals was to have a craft party every month. In January, I rounded up some gals who could make it and we made t-shirt necklaces. We had a GREAT time making these.

They are simple, easy, cheap and fun. We experimented with design and crafted a different necklace amongst each of us. So fun. Of course, we had appetizers/finger foods and desserts to eat as well because no night of gals gathering can go without food!

Check out the fun we had!

Yes, I was eating and hubby shot the picture at just the right time. Thanks, babe.

Each one is different! Love it!
What I loved about this craft: so easy to personalize! My necklace is 2 lengths - shorter braided strands and longer tubed strands, Amanda on the right has just a tube necklace with a knot wrap- cute! Amy in gray made tube strands, but made braided knot wrapping and Kasey made long braids.

Love the diversity and the fun in this. Each one took about half an hour. Good times and great fun!

Friday, January 27, 2012

Getting organized: Necklace Organizer

Oh the frustration of tangled necklaces in a jewelry box. That's why I am not a jewlery box person. I would constantly want to wear the necklace in the back and when I rotated the necklaces around, they would all tangle together. Now, I love the jewelry box I had because it was given to me by my grandma who passed away almost 14 years ago. But, I really cannot use jewelry boxes effectively.

I had been coming up with all kinds of ideas to make my own jewlery organizer. Some included a towel bar with shower cutain hooks to hold the necklaces. Some were frames with the backing out of it and ribbon in it's place. Some were cork boards with pins to hold the necklaces. Larger armoire type jewelry boxes. So many choices, but what was most cost effective and useful for me?

Well, I decided to use corkboard covered in fabric and cup hooks to hold the necklaces. Here's how it turned out:


A how-to will post next week. It will have step by step instructions. Altogether, this cost me $14. So worth it. Of course, I could have waited another day or two to buy the large piece of corkboard for an additional $4 off, but I wanted to get this done before the craft party and I returned to work!

I love it. I love the fabric for it (thank you cousin). I love that it fits in that room perfect. I just think it's grand! So glad I did this. I can see everything and everything has a place. That's soooo nice! I'm just working away at this 2012 goals.  How are you doing with your goals?